
A deck installation can be a fun venture, adding to the value of your property and enhancing the quality of your life. But, it isn’t as simple as grabbing a few tools or calling in professional deck builders and calling it a day. From material consideration to permit grants to the final light installations and everything else in between, this blog aims to give you all the information you need before starting on your deck addition project.
Deck Installations: Considerations & Instructions
Okay, let’s say you wake up one day and decide you want a deck to enjoy the outdoors. What type of deck are you thinking of? What are the materials and tools required, and do you have the necessary skills and patience to make it happen? Whether you’re a DIY enthusiast or someone planning on hiring a custom deck installation service, here is all you need to keep in mind.
Let’s delve into what goes on behind the scenes before your deck comes to life.
Step 1: The Planning Phase
A deck installation isn’t something you can just wing. You need to set up proper plans before you can even think about moving on to the next phase.
- The Purpose: First off, decide what your deck is going to accomplish. Are you just interested in some additional sunlight? Do you want to host parties? Or are you simply looking for an outdoor dining area for your family? This answer will determine your next steps.
- Budgeting: Now that you know what you want to achieve, it is important to see if you have the necessary funds. Set a budget for your deck and then set aside an additional 10-20%. This will act as your safety net in case anything goes wrong.
- Material Selection: decide on what type of material you want. You could go for a wooden, composite, or even PVC. The material depends on the look you’re going for, the weight your deck will have to support, and the maintenance you’re willing to put in.
- Designs: You need to decide on the shape of the deck next. You don’t necessarily have to stick to the typical rectangular decks. Consider triangular or circular decks if they suit your aesthetics more. You could also opt for staircases that run in the middle of the deck or make room for them on the side. The choice is yours.
Step 2: Acquiring Permits
Okay, up next is getting your plans approved. Different towns have different requirements for deck designs and foundation depths, set up for safety regulations. In addition to that, you might want to consult your HOA in case you live in a neighborhood that is managed by them. Once your plans are approved, you can finally move on to the construction phase.
Step 3: The Deck Installation Phase
Now your vision can start taking shape. If you’ve already hired deck installation contractors, they will take over from here, and you just need to coordinate with them to ensure the final result will be to your liking. But, if you’re going to get your hands dirty and pick up the power tools yourself, here is what the building phase will entail.
- Gathering All Your Supplies: Make sure you have all your nails, saws, screw drivers, and material-of-choice ready before starting on your new deck. This will ensure the building process goes smoothly.
- Site Prep: Next, get to work removing all the rocks, shrubbery, and debris that are in the way. Be sure to measure everything with a transit level or a laser level so that you have an even base for your new deck and excavate where necessary.
- Foundation Installations: typically, decks rely on concrete footings or piers to support the main beams, so carefully dig to the correct depth and lay down your foundations.
- Deck Framing: Now, start by attaching a ledger board to your house, ensuring that it is level and flush at multiple intervals. Using joist hangers and metal connectors, ensure you have a stable connection that is ready to take on the weight of the decking, furniture, and whatever else you have planned.
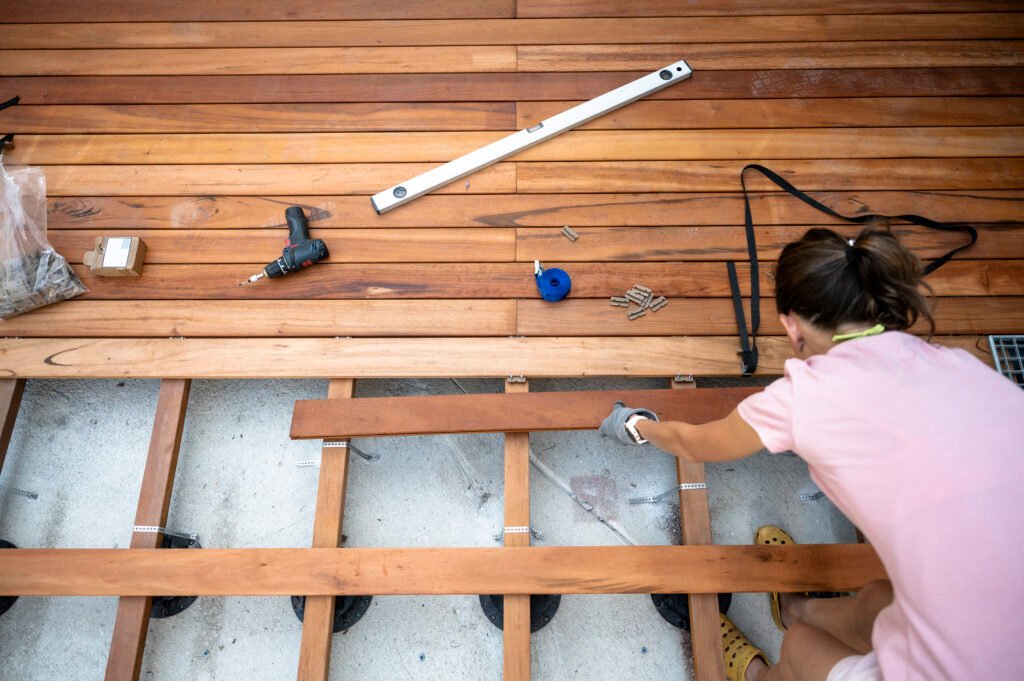
- Lay Decking Boards: starting from the side furthest from your house, lay down your decking boards perpendicular to the joists. Secure each board with at least two screws at every joist crossing and leave a gap of 1/8 inch to accommodate drainage and expansion.
- Railings & Stairs: for decks 30 inches above ground level, railings are a code requirement. Secure posts to the framing and then move on to the top and bottom rails before attaching the ballesters. For your stairs, carefully calculate the rise and run for safety and comfort. Build stringers, attach treads and risers, and don’t skip on the railing for safety.
Step 4: The Finishing Touches
In case of wood decking, don’t forget to add a layer of paint and sealant to protect against the effects of time and weather. Add lighting for safety and aesthetics, and then set up your deck furniture. Make sure everything is harmonious and also complements your lifestyle, and you’re all done!
Conclusion
In conclusion, a deck installation is an interesting exterior renovation project that can add to the curb appeal of your property and raise your lifestyle standards. However, simply having a vision and building the deck are two separate things. You need to consider carefully, plan, gain permits, and set up your deck. This blog was meant to help you so that you don’t run into any surprises or setbacks along the way, but if you still have any questions, don’t hesitate to ask!
FAQs
What are some common mistakes to avoid during deck installation?
Things you should be mindful of include inadequate site prep, building code considerations, and improper fastening of decking.
Should I hire or DIY my deck installation?
Experienced and licensed professionals have the skills and tools necessary to safely and efficiently build your deck. If you’re unsure of your expertise, you should opt for a deck installation contractor.
What are some popular decking styles in 2025?
2025 has seen a shift toward low-maintenance and natural looks, with PVC decks and wooden decks remaining a trendy choice.